Google Cloud GPU Instance
Instructions for setting up a GPU instance on Google Cloud
- Install Google Cloud SDK on your laptop:
https://cloud.google.com/sdk/ -
Install file by executing the following in the terminal:
./google-cloud-sdk/install.sh -
Initialize gcloud in terminal (https://cloud.google.com/compute/docs/gcloud-compute/?hl=de):
gcloud init - Request limit increase for instances
-
Put in number of GPUs & CPUs, Size:
https://console.cloud.google.com/compute/quotas?hl=de&_ga=1.69181649.1124953923.1496188820 -
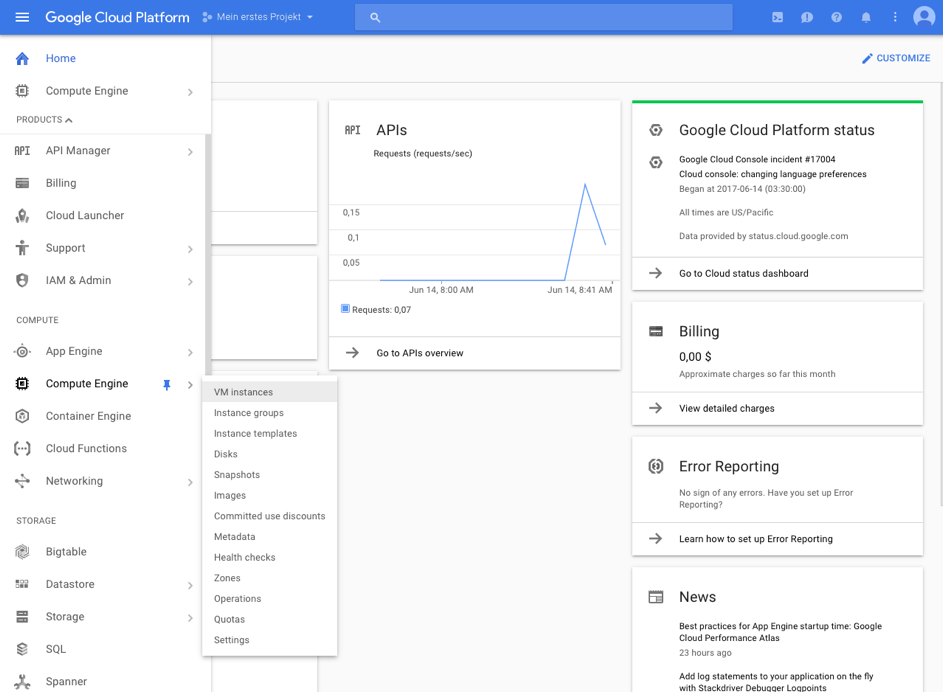
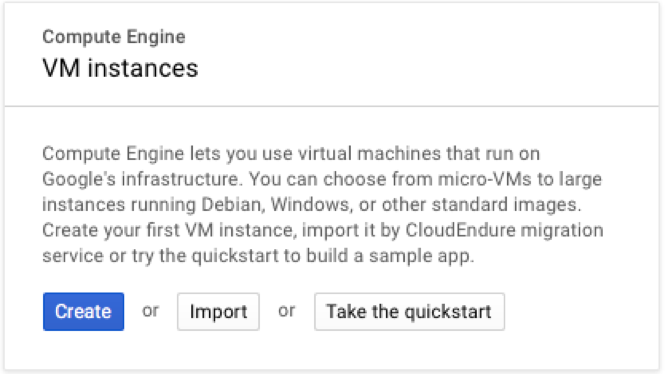
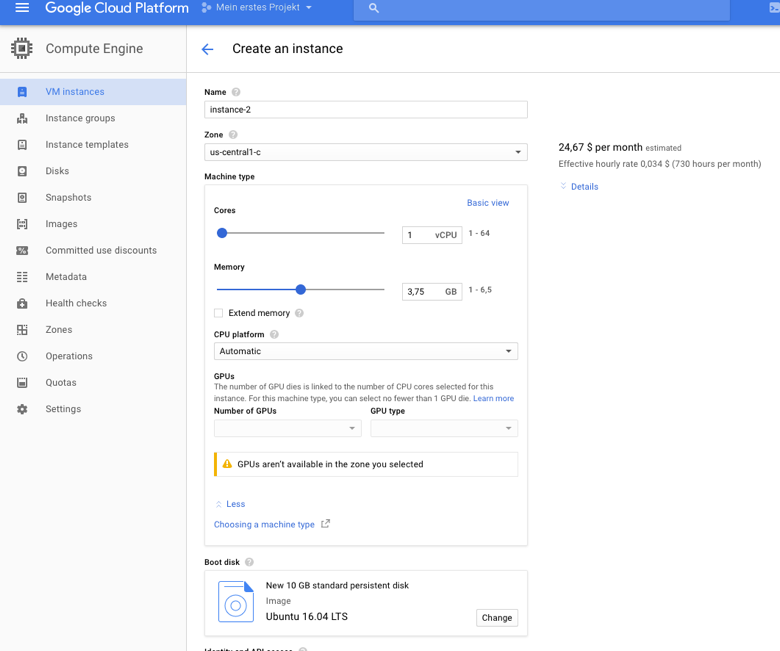
Create GPU instance:
-
-
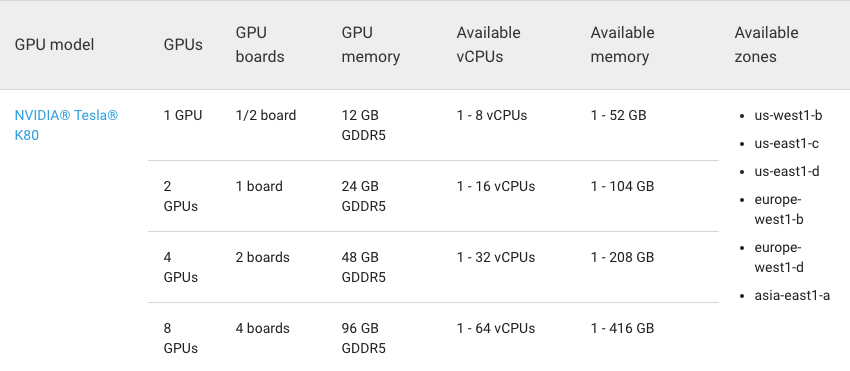
GPU are only available in certain areas:
-
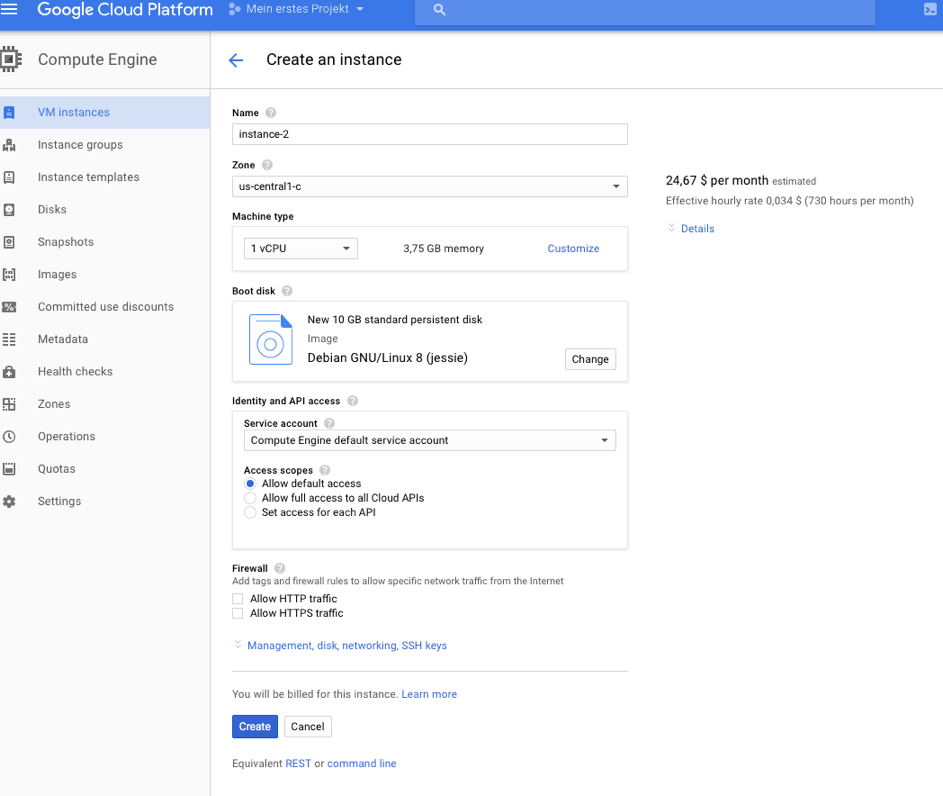
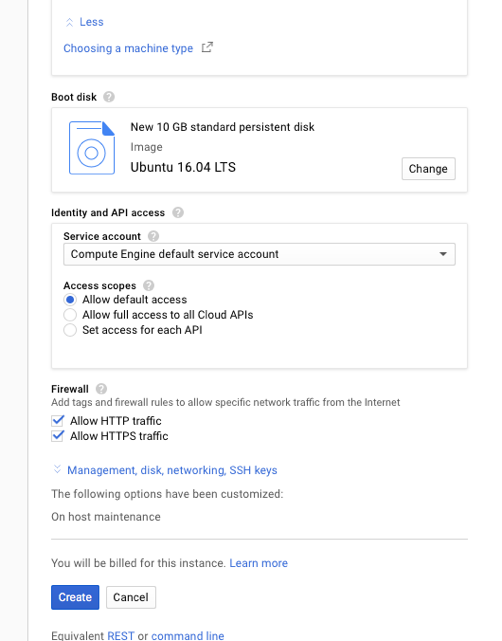
- Choose Boot disk -> Ubuntu 16.04 LTS
- Choose 30 GB HDD
-
Select zone, number of GPUs & CPUs and memory
-
Allow HTTP & HTTPS traffic
-
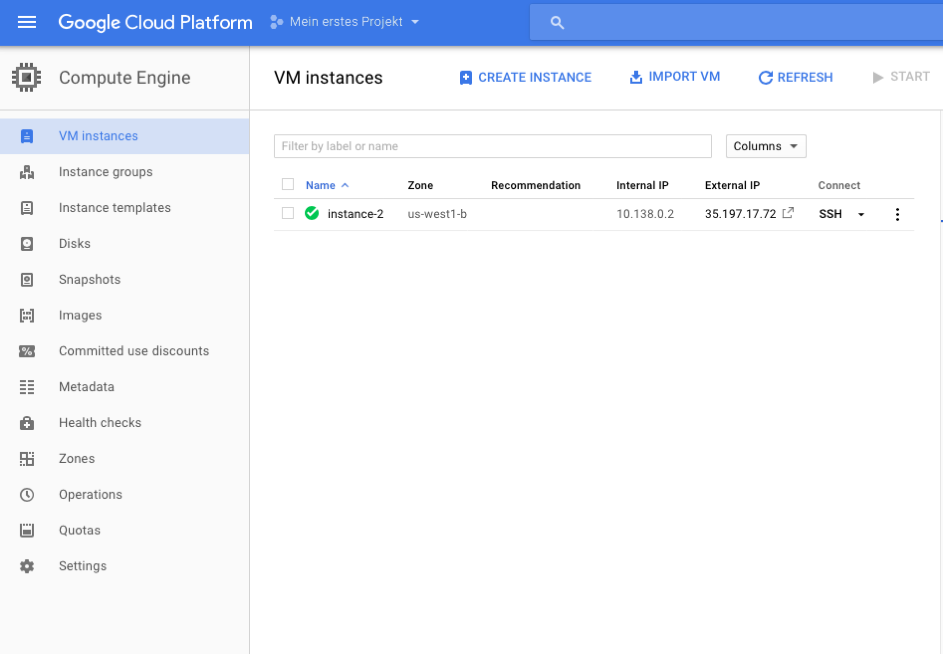
Instance is set up
-
Connect to instance:
gcloud compute config-ssh

-
Or:
gcloud compute ssh instance-2 --zone us-west1-b ssh –i ~/.ssh/google_compute_engine USERNAME@IP_ADDRESS -
Install GPU drivers:
curl –O http://developer.download.nvidia.com/compute/cuda/repos/ubuntu1604/x86_64/cuda-repo-ubuntu1604_8.0.61-1_amd64.deb sudo dpkg -i cuda-repo-ubuntu1604_8.0.61-1_amd64.deb sudo apt-get update sudo apt-get install cuda -y -
Insert lines in bashrc:
echo 'export CUDA_HOME=/usr/local/cuda' >> ~/.bashrc echo 'export PATH=$PATH:$CUDA_HOME/bin' >> ~/.bashrc echo 'export LD_LIBRARY_PATH=$LD_LIBRARY_PATH:$CUDA_HOME/lib64' >> ~/.bashrc source ~/.bashrc - Download cuDNN from Nvidia Developer site -> Sign Up required
- https://developer.nvidia.com/rdp/cudnn-download
- Save on laptop: https://developer.nvidia.com/compute/machine-learning/cudnn/secure/v5.1/prod_20161129/8.0/cudnn-8.0-linux-x64-v5.1-tgz
-
Open terminal on laptop and copy file to instance:
gcloud compute scp cudnn-8.0-linux-x64-v5.1.tgz *INSTANCE_NAME*:~ -
Go to terminal on instance and extract & install:
tar -xzvf cudnn-8.0-linux-x64-v5.1.tgz sudo cp cuda/lib64/* /usr/local/cuda/lib64/ sudo cp cuda/include/cudnn.h /usr/local/cuda/include/ rm -rf ~/cuda rm cudnn-8.0-linux-x64-v5.1.tgz sudo apt-get update -
Install python packages:
sudo apt-get install python-pip sudo apt-get install python-numpy python-scipy python-matplotlib ipython ipython-notebook sudo apt-get install python-pandas python-sympy -
Install Anaconda:
wget https://repo.continuum.io/archive/Anaconda3-4.4.0-Linux-x86_64.sh bash Anaconda3-4.4.0-Linux-x86_64.sh - Set Anaconda as preferred environment:
which pythonshould beusr/bin/python-
Important:
source .bashrc
- Generate config file:jupyter notebook –generate-config mkdir certs sudo openssl req -x509 -nodes -days 365 -newkey rsa:1024 -keyout mycert.pem -out mycert.pem
-
Configure jupyter:
cd ~/.jupyter/ vi jupyter_notebook_config.py -
Change username if necessary:
  c = get_config()
  c.IPKernelApp.pylab = 'inline'  # if you want plotting support always in your notebook
  c.NotebookApp.certfile = u'/home/ubuntu/certs/mycert.pem' #location of your certificate file
  c.NotebookApp.ip = '*'
  c.NotebookApp.open_browser = False  #so that the ipython notebook does not opens up a browser by default
  #c.NotebookApp.password = u'sha1:98ff0e580111:12798c72623a6eecd54b51c006b1050f0ac1a62d'  #the encrypted password we generated above
  c.NotebookApp.port = 8888

  source .bashrc
-
Create SSH tunnel:
ssh -i ~/.ssh/google_compute_engine -L 8899:localhost:8888 USERNAME@35.197.12.149
jupyter notebook

-
Open Browser and type in token:
https://localhost:8899/ -
Install Keras and Tensorflow:
pip/conda install keras pip/conda install tensorflow-gpu conda install opencv -
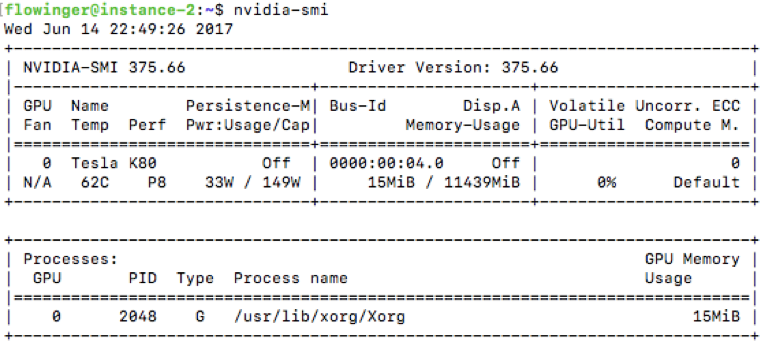
If GPU process is not running, try to run a keras/tf model first:
nvidia-smi
Sources / Appendix
https://medium.com/google-cloud/running-jupyter-notebooks-on-gpu-on-google-cloud-d44f57d22dbd
https://cloud.google.com/compute/docs/gpus/add-gpus?hl=de#install-driver-manual
https://cloud.google.com/compute/docs/gcloud-compute/?hl=de
-
One line code to create GPU instance:
gcloud beta compute instances create gpu-inst1 --machine-type n1-standard-2 --zone us-west1-b --accelerator type=nvidia-tesla-k80, count=1 --image-family ubuntu-1604-lts --image-project ubuntu-os-cloud --boot-disk-size 30GB --maintenance-policy TERMINATE --restart-on-failure